Your Shopping Cart


ICONSIGN Upgrade Lash Lift Kit & Eyes Makeup Tools
- Regular price
- $17.99
- Sale price
- $17.99
- Regular price
-
- Unit price
- per
✨ICONSIGN Upgrade Lash Lift Kit – Long-Lasting Curl & Nourish! ✨
Achieve stunning, natural curls for 6-8 weeks with the ICONSIGN Lash Lift Kit. No falsies, extensions, or mascara needed!
💖 Why You’ll Love It:
✔ Up to 8 Weeks of Curl
✔ Complete 10-Piece Kit
✔ Gentle, Nourishing Formula
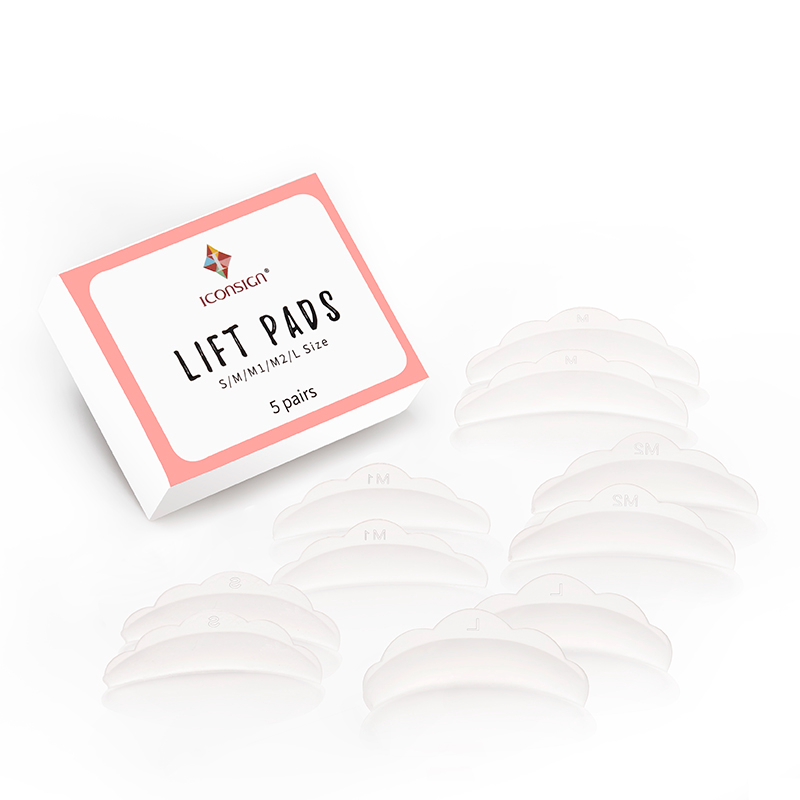
✔ Reusable Rods in 5 Sizes
💡 How to Use:
1️⃣ Apply perm & fixation lotions.
2️⃣ Use aftercare formula every 4-5 days.
Specification:
Material: Perm & Fixation Lotion, Aftercare Formula, Reusable Rods (5 sizes)
Quantity: 10-Piece Kit
✨ Get perfect lashes with ease! 💖
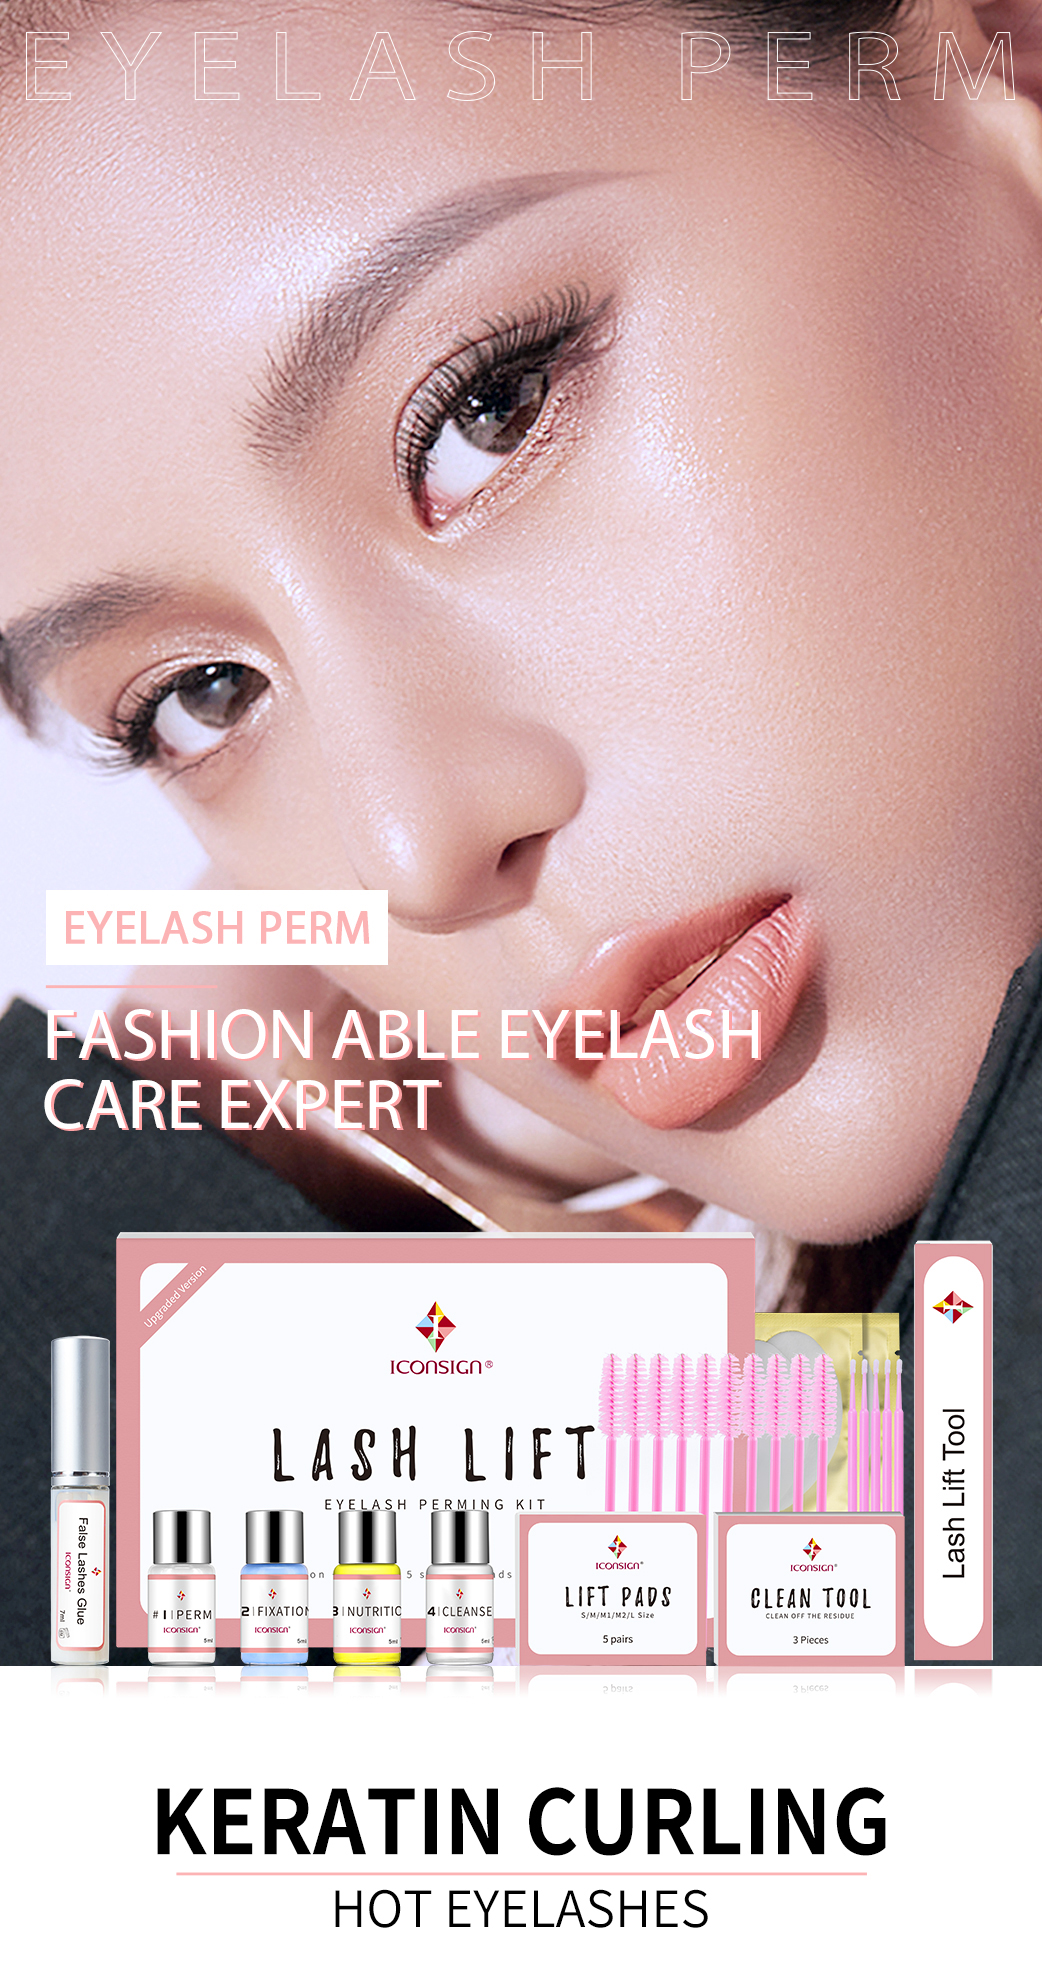
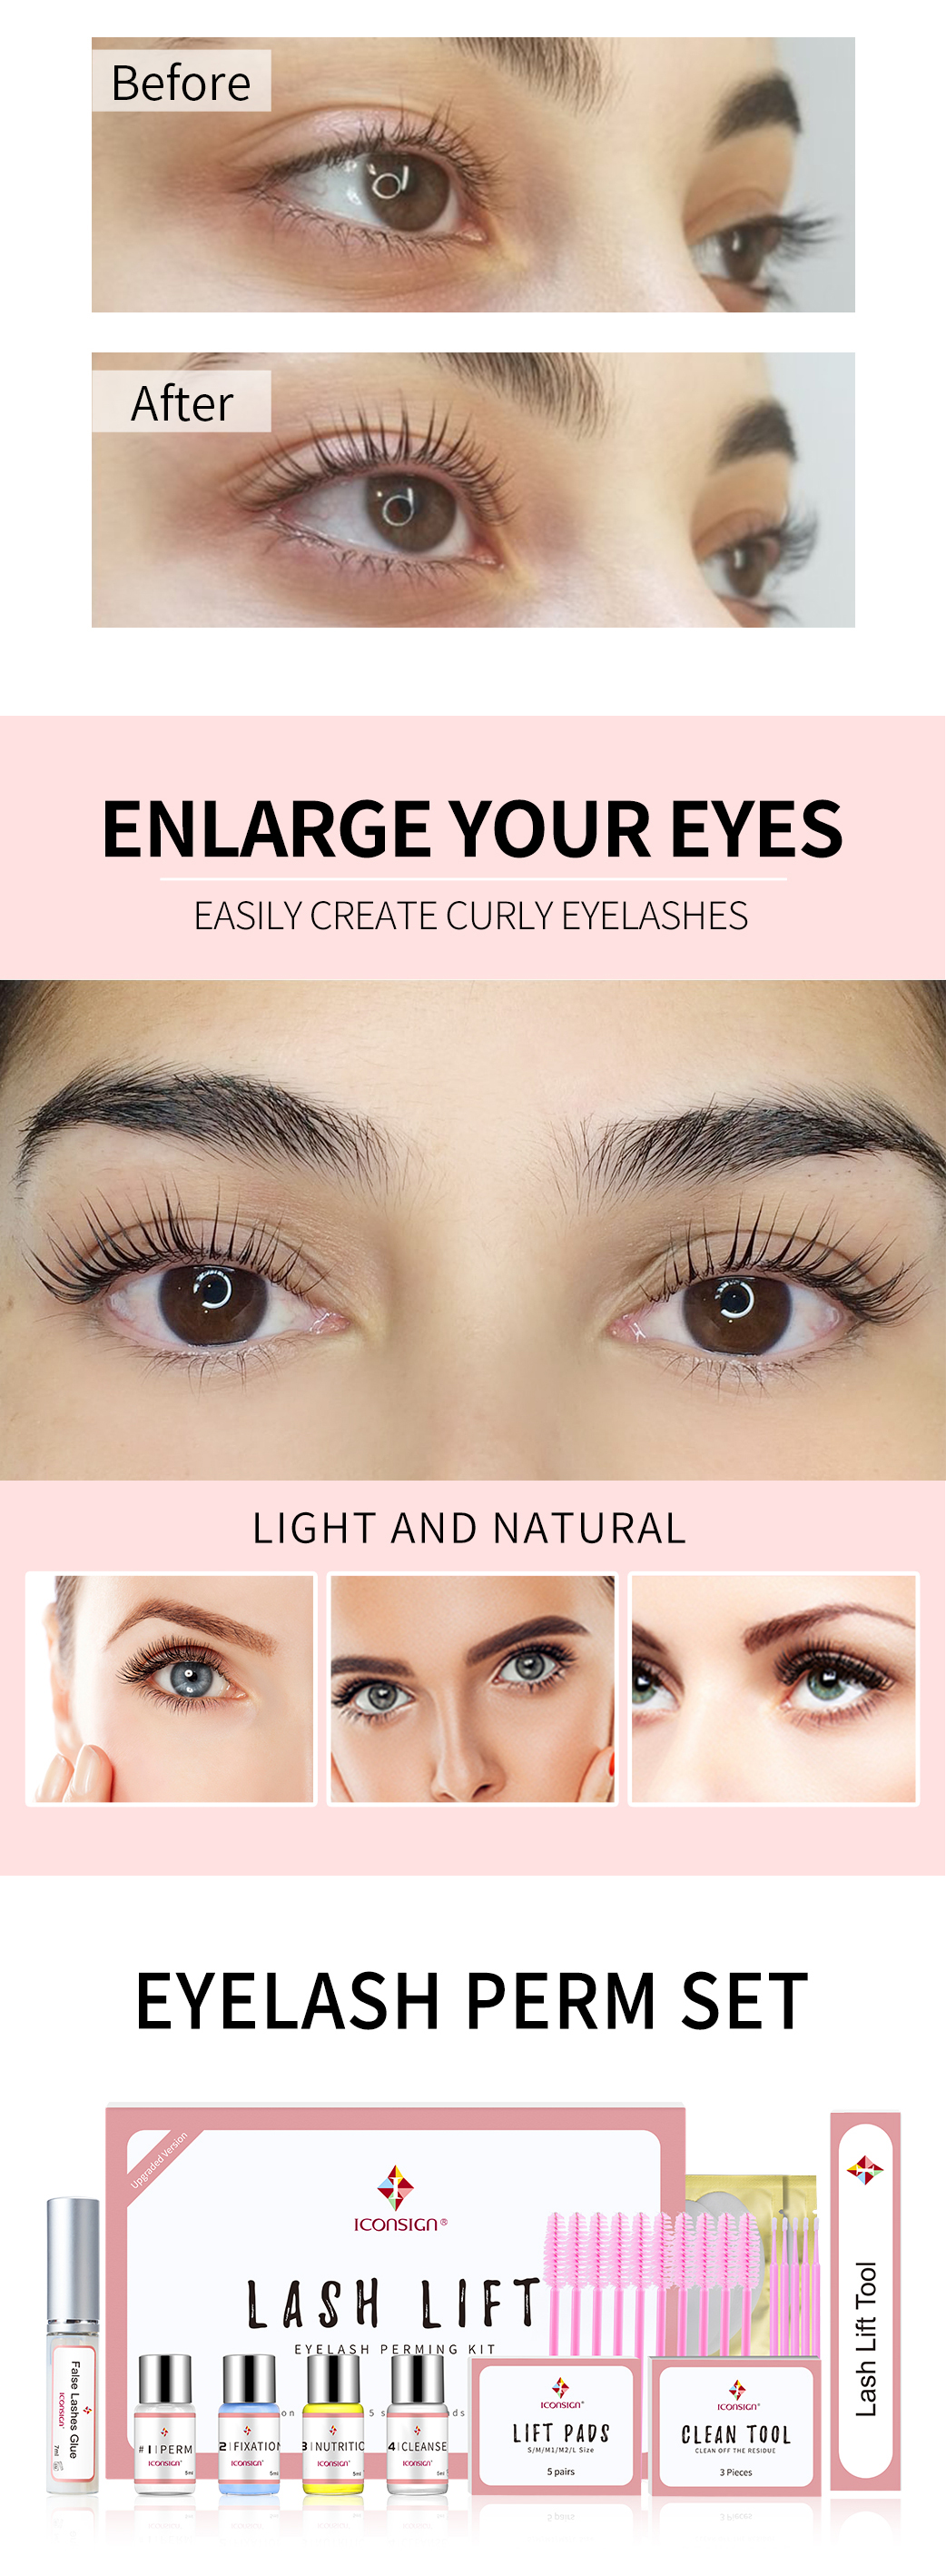
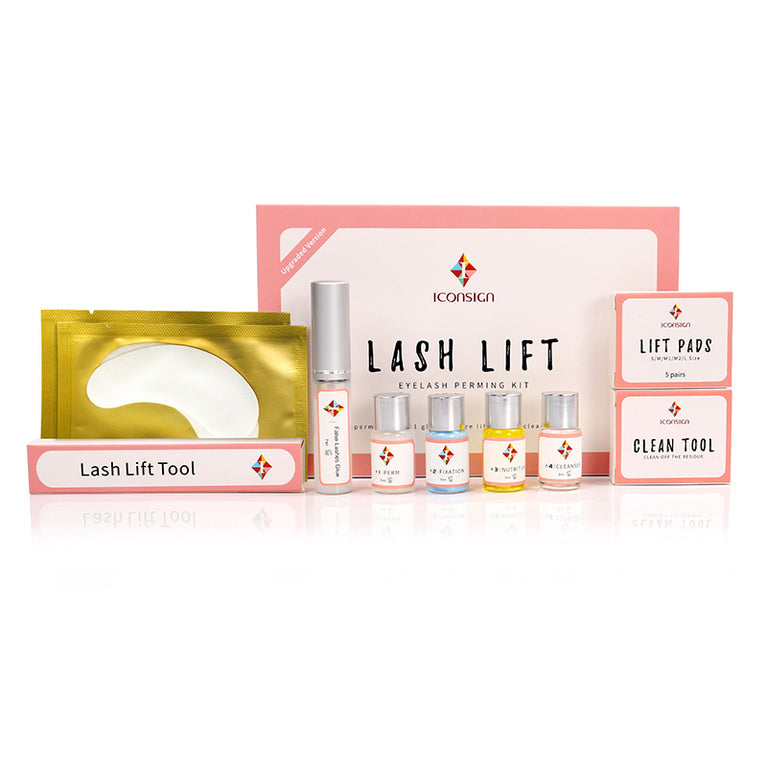
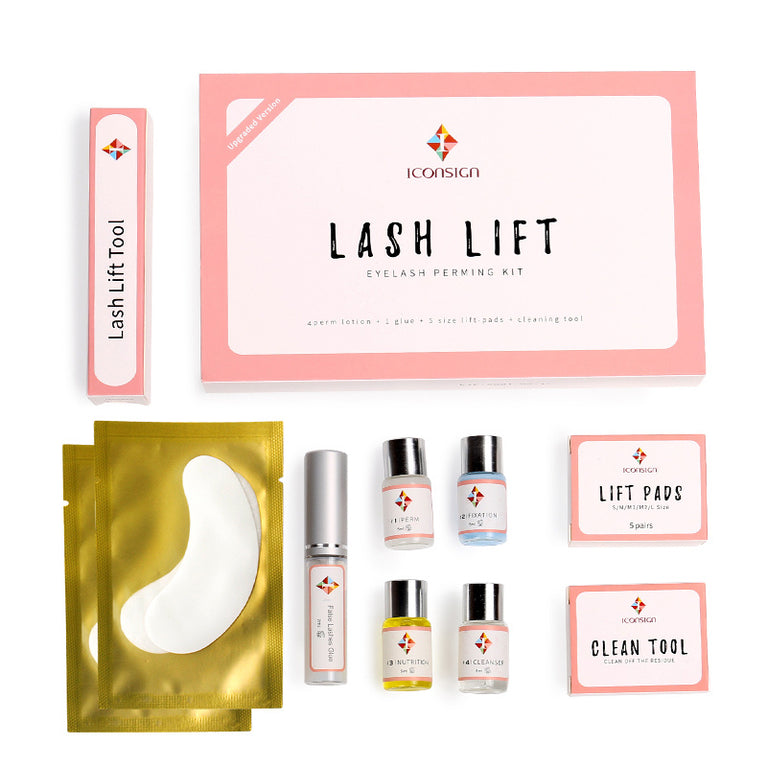
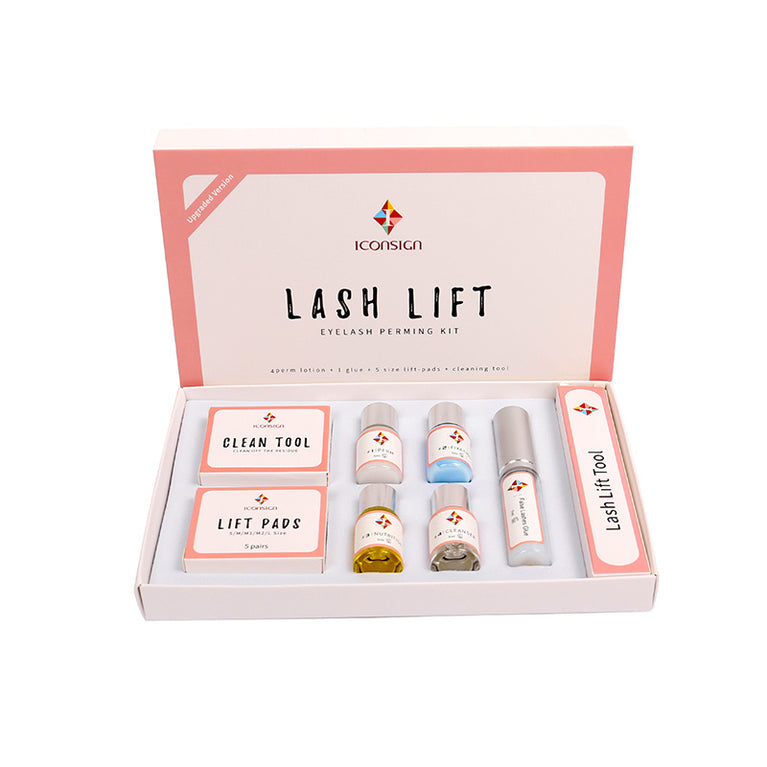
A 10-piece set with everything you need for a full lash perm
You won't have to buy any other tools, creams or glue. All you need for a long-lasting curl comes in one box.
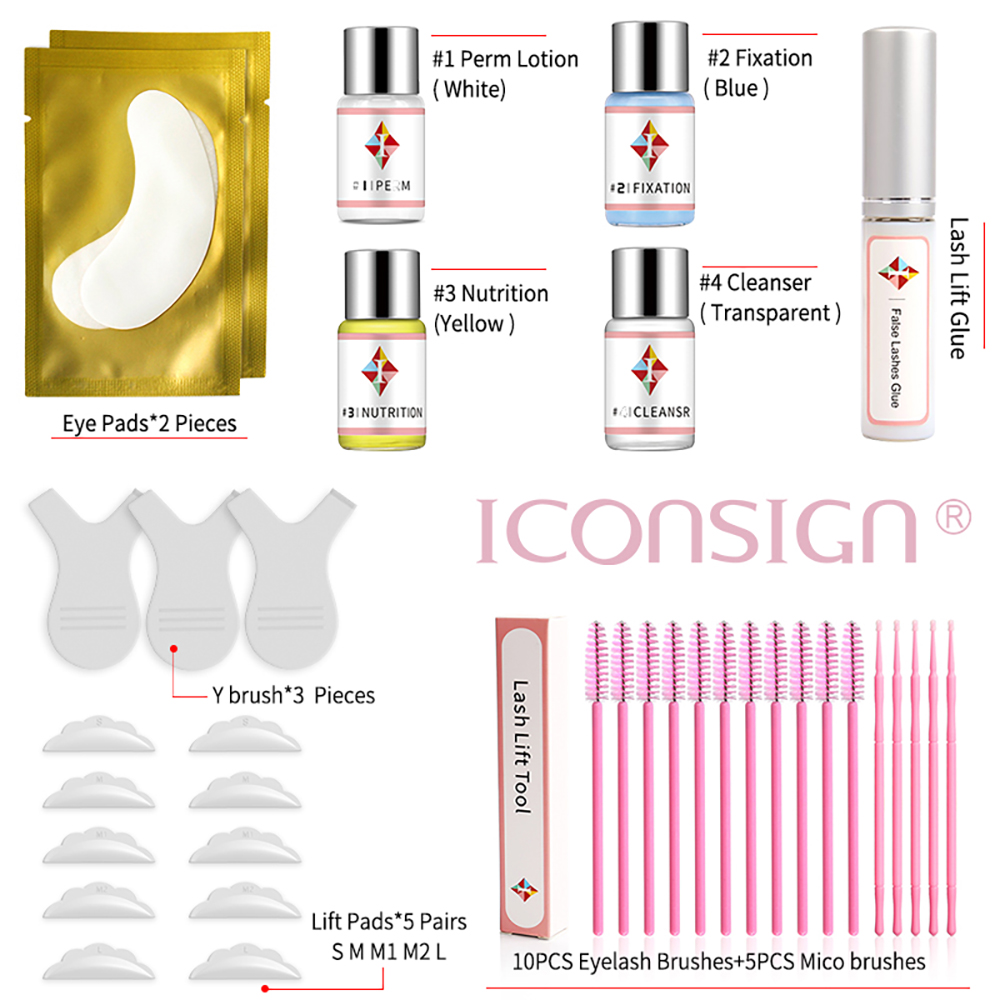


Application Instructions:
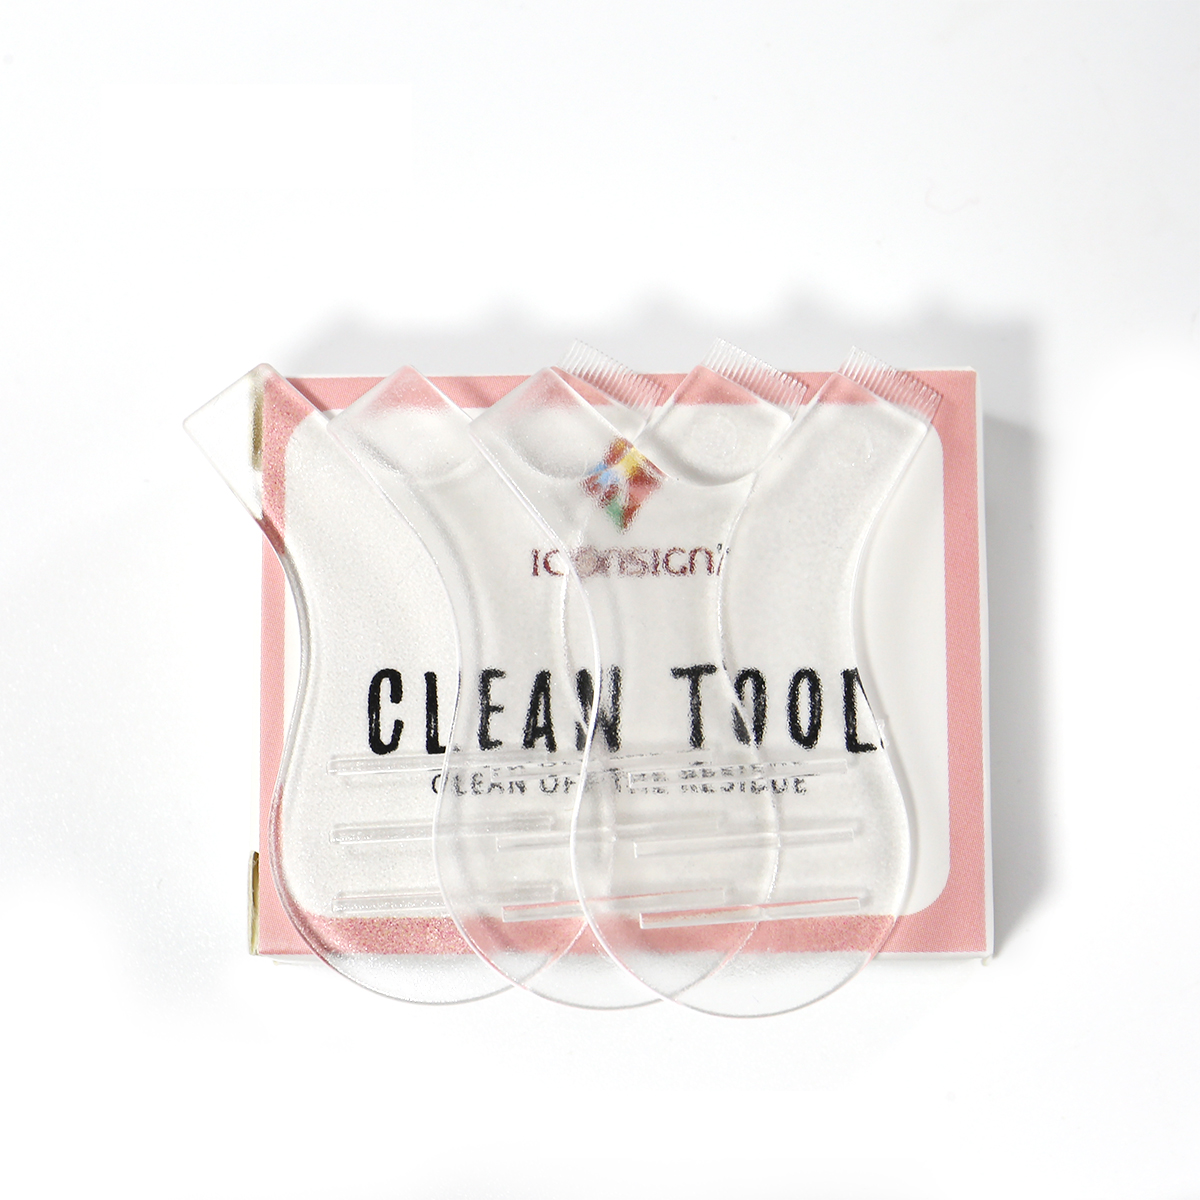
Step 1: Use the cleanser to remove any oil, dust or makeup residue from the eyelashes
tep 2: Put the under-eye pads on the lower eyelids
Step 3: Apply the glue to the back of the lash lift pads, wait for 20 seconds, then put them on your eyelids. As close to your lash line as possible.
Step 4: Apply the glue to the front of the lash lift pads.
Top Tip: No need to put too much glue, it needs to wait for 30-60 seconds then put the lashes on.
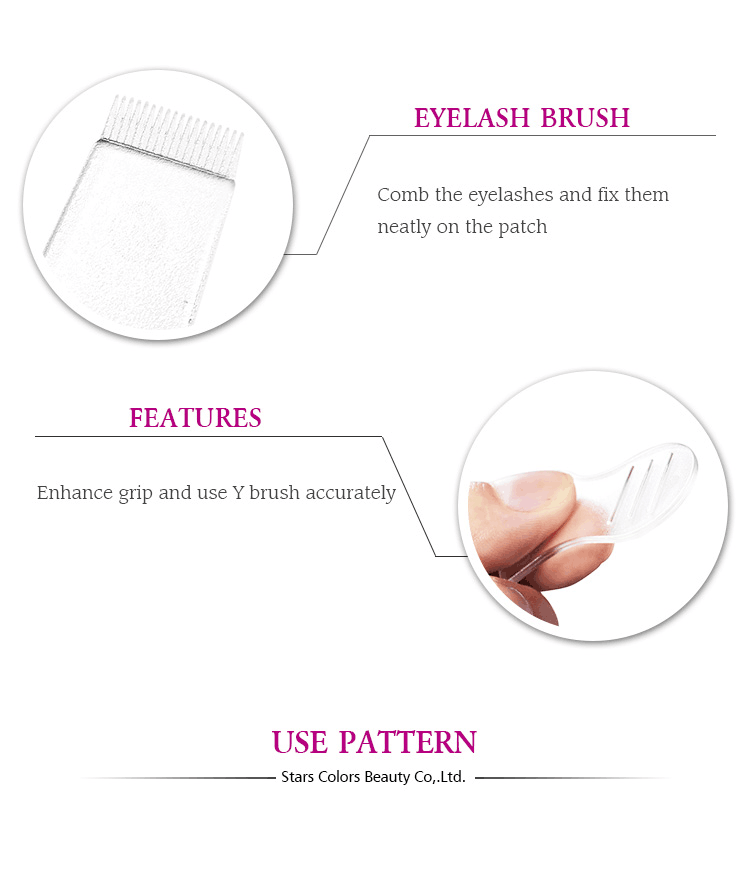
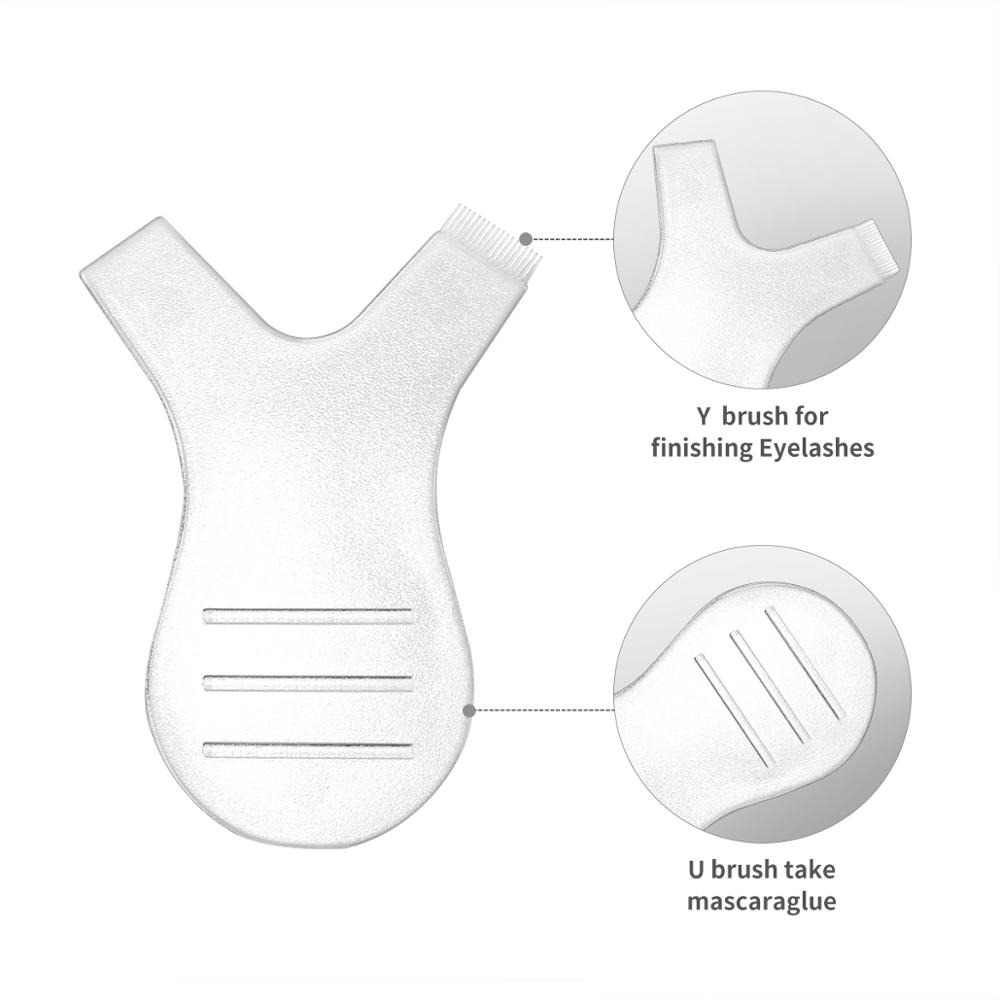
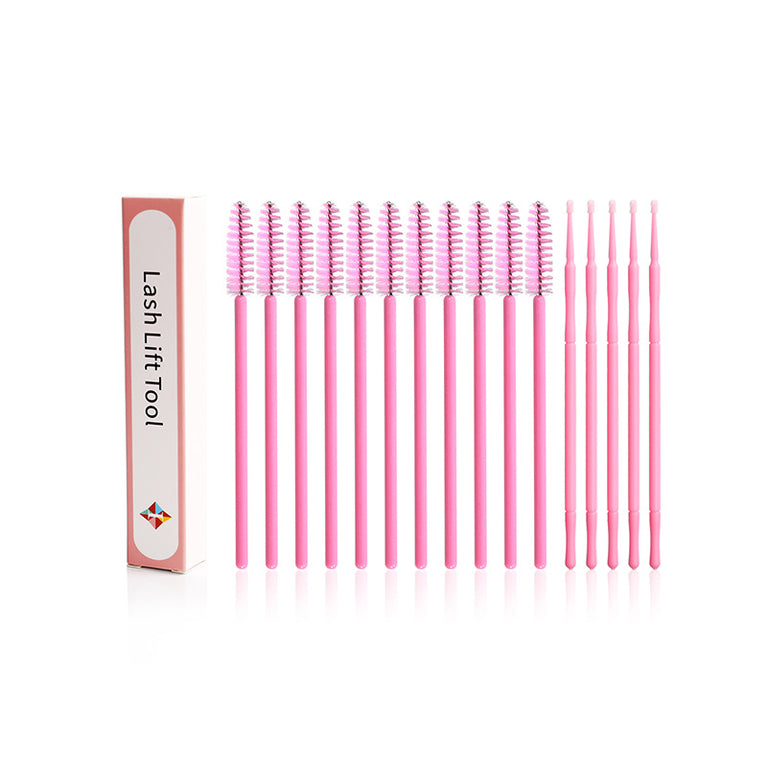
Step 5: Use a Y brush to lift the lashes from the root back onto the pads. The lashes should be aligned and not crossing each other.
Step 6: Apply the perming lotion #1 to the eyelashes. Then cover the eyes with plastic wrap and leave for 10 minutes.
Step 7: Remove the perm lotion #1 with Y brush , then apply the fixing lotion #2 to the eyelashes. Then, cover the eyes again with plastic wrap and leave for 10 minutes.
Step 8: Remove the plastic wrap , and use the cleanser #4 to remove any product residue, with the Y brush ,wiping with the comb side.
Step 9: Last, remove the lift pads from the upper part of your eyelid, then use the nutrition lotion #3 to nourish your eyelashes.
Aftercare instructions:
Apply the nourishing aftercare formula to your lashes once every 4–5 days.
Approved ingredients that are kind to your skin
Safety-tested and certified, the carefully formulated products won't irritate the delicate skin around your eye. Still, you should always do an allergy test 24 hours before use.
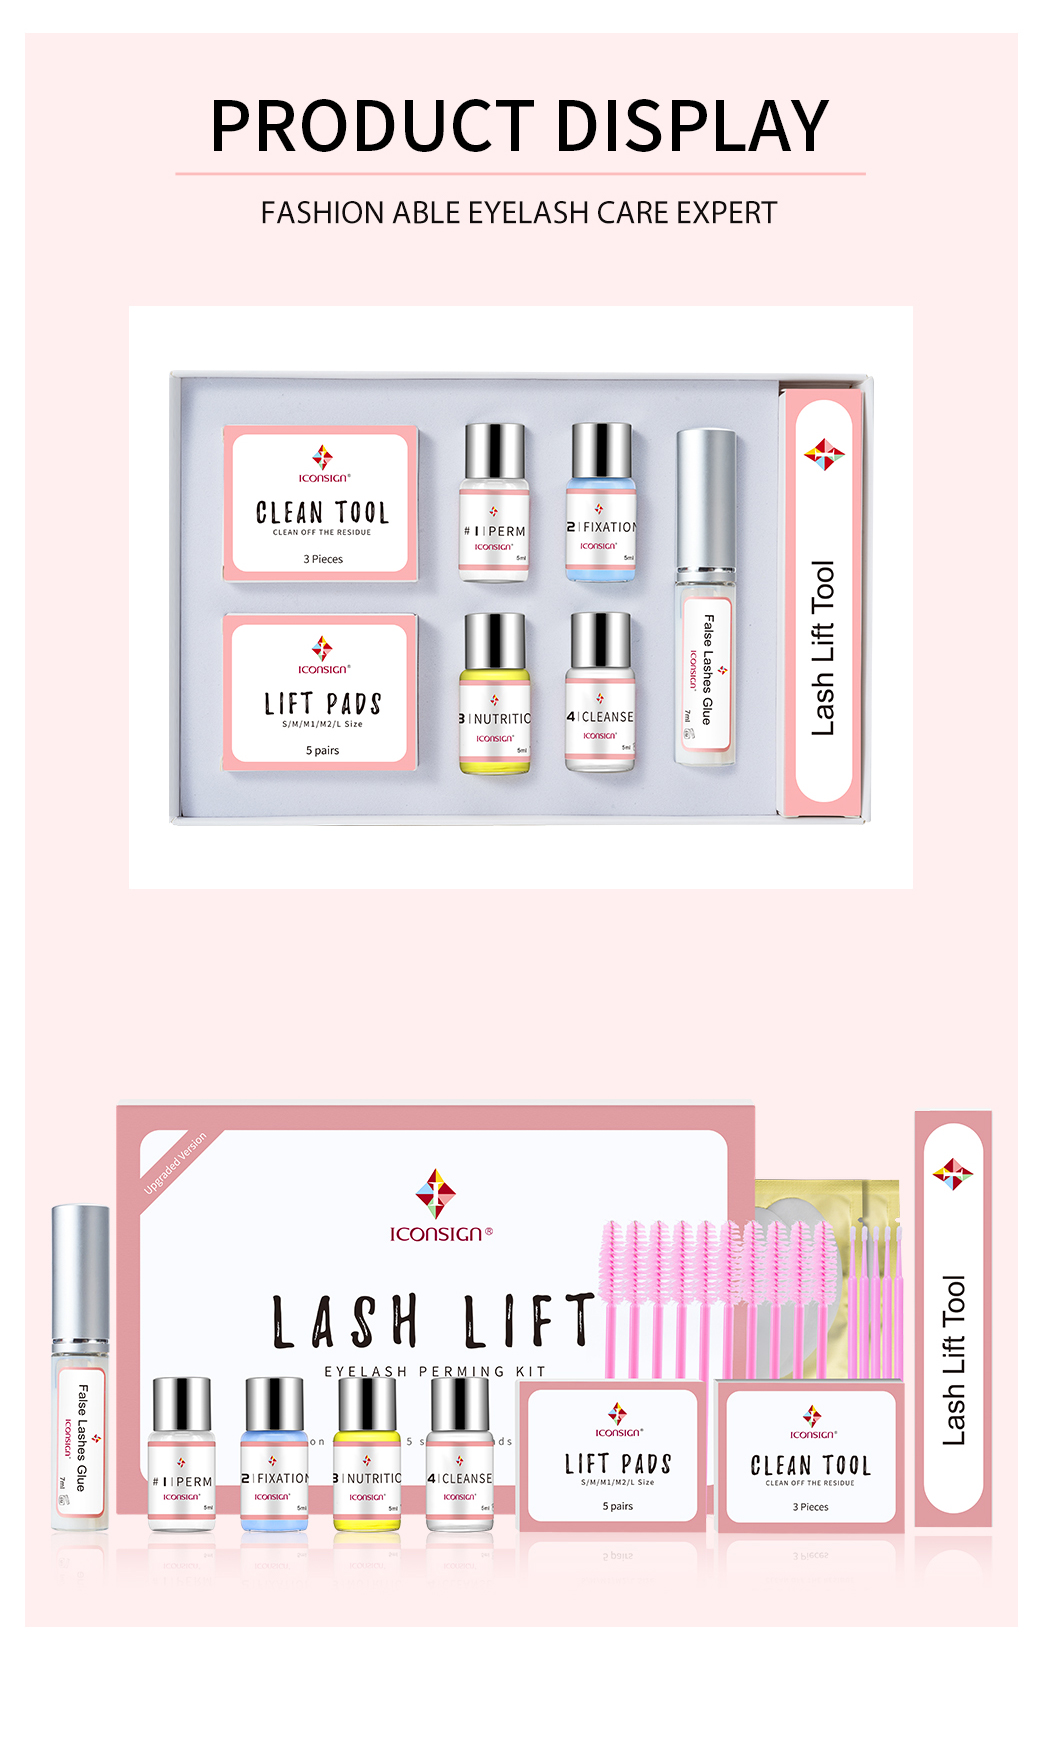
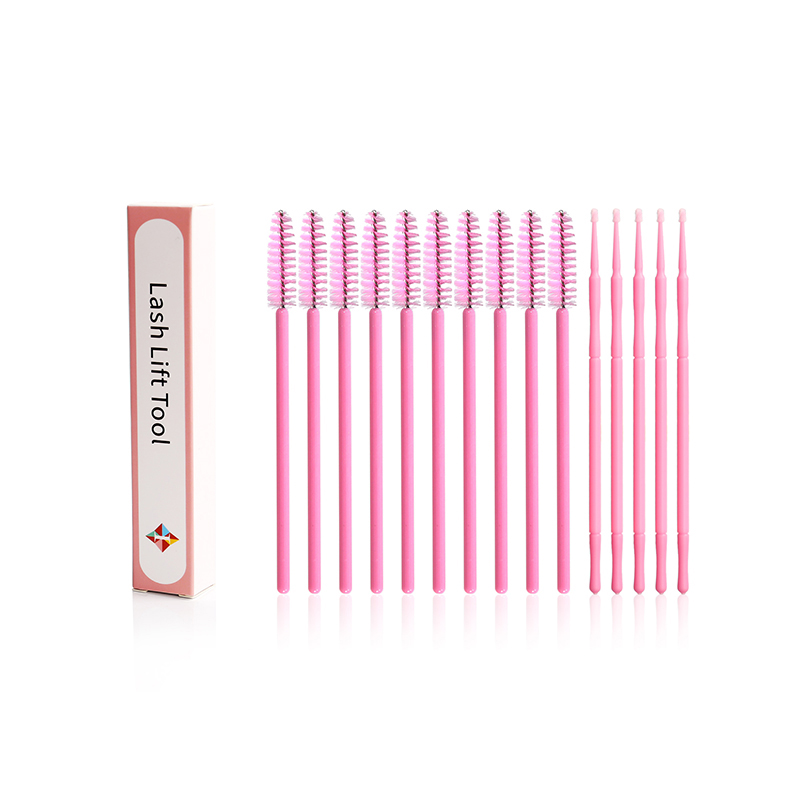
Eyelash Brush:10 pieces; Mico brush:5 pieces
Couldn't load pickup availability
Shipping & Returns
Shipping & Returns
Free shipping and returns available on all orders above $99
We ship all US domestic orders within 5-10 business days!
Share


✨ICONSIGN Upgrade Lash Lift Kit – Long-Lasting Curl & Nourish! ✨
Achieve stunning, natural curls for 6-8 weeks with the ICONSIGN Lash Lift Kit. No falsies, extensions, or mascara needed!
💖 Why You’ll Love It:
✔ Up to 8 Weeks of Curl
✔ Complete 10-Piece Kit
✔ Gentle, Nourishing Formula
✔ Reusable Rods in 5 Sizes
💡 How to Use:
1️⃣ Apply perm & fixation lotions.
2️⃣ Use aftercare formula every 4-5 days.
Specification:
Material: Perm & Fixation Lotion, Aftercare Formula, Reusable Rods (5 sizes)
Quantity: 10-Piece Kit
✨ Get perfect lashes with ease! 💖
A 10-piece set with everything you need for a full lash perm
You won't have to buy any other tools, creams or glue. All you need for a long-lasting curl comes in one box.
Application Instructions:
Step 1: Use the cleanser to remove any oil, dust or makeup residue from the eyelashes
tep 2: Put the under-eye pads on the lower eyelids
Step 3: Apply the glue to the back of the lash lift pads, wait for 20 seconds, then put them on your eyelids. As close to your lash line as possible.
Step 4: Apply the glue to the front of the lash lift pads.
Top Tip: No need to put too much glue, it needs to wait for 30-60 seconds then put the lashes on.
Step 5: Use a Y brush to lift the lashes from the root back onto the pads. The lashes should be aligned and not crossing each other.
Step 6: Apply the perming lotion #1 to the eyelashes. Then cover the eyes with plastic wrap and leave for 10 minutes.
Step 7: Remove the perm lotion #1 with Y brush , then apply the fixing lotion #2 to the eyelashes. Then, cover the eyes again with plastic wrap and leave for 10 minutes.
Step 8: Remove the plastic wrap , and use the cleanser #4 to remove any product residue, with the Y brush ,wiping with the comb side.
Step 9: Last, remove the lift pads from the upper part of your eyelid, then use the nutrition lotion #3 to nourish your eyelashes.
Aftercare instructions:
Apply the nourishing aftercare formula to your lashes once every 4–5 days.
Approved ingredients that are kind to your skin
Safety-tested and certified, the carefully formulated products won't irritate the delicate skin around your eye. Still, you should always do an allergy test 24 hours before use.
Eyelash Brush:10 pieces; Mico brush:5 pieces
